
To support professional, authenticated, and flexible email campaigns, the CDP allows organizations to configure multiple sending domains and email identities directly from the Admin interface. This gives marketing teams control over the technical backbone of email deliverability while enabling brand-specific or use-case-specific sender customization.
📍 Why Domain & Sender Configuration Matters
Before sending emails from your CDP account, it’s essential to configure:
-
Verified Domains – mandatory DKIM, SPF and DMARC settings ensure your messages don’t land in spam
-
Multiple Senders – tailor sender identity based on the campaign type
-
Optional Reply-to Addressing – manage responses or bounces differently
Together, these configurations boost trust, improve open rates, and help support large-scale and multi-brand operations.
🔧 Step-by-Step: Configure Your Email Domain and Sender
1. Access the Admin Email Configuration
Navigate to the Admin section and select the Email Configuration tab.
2. Add and Verify a Sending Domain
You can add one or multiple domains here (e.g., clubname.com, foundation.clubname.com, etc.). For each domain: you must configure DKIM, SPF and DMARC records with your domain hosting provider.
If you do not wish to receive automatic system response messages (Feedback Forwarding) after your sendouts, e.g. "this email cannot be delivered to address X", you can disable these notifications:

3. Define ‘From’ Email Addresses
Under each verified domain, you can define one or more sender addresses, e.g.:
-
ticketing@clubname.com -
newsletter@clubname.com -
sponsor-campaign@clubname.com
Important:
Only the domain part (e.g., @clubname.com) needs to exist and be verified. The first part (before the @) can be made-up for campaign purposes. It doesn’t have to be a real inbox.
You can:
-
Set a default sender by selecting the radio button
-
Add multiple senders for different purposes or departments
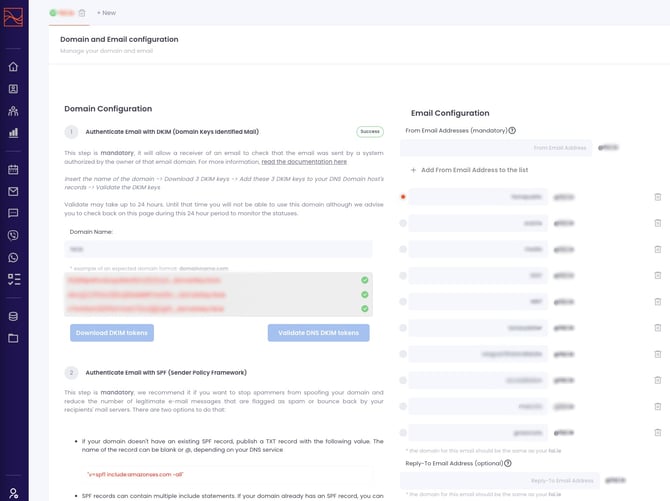
4. Set an Optional ‘Reply-To’ Address
You can specify a different address for replies, such as:
-
support@clubname.com -
customer.service@clubname.com
If left blank:
-
Replies, out-of-office and bounce messages go to the default sender address
If filled in:
-
Replies and bounce reports are redirected to the Reply-To address instead
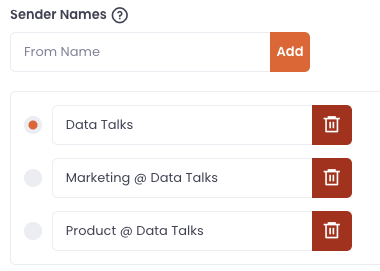
5. Manage Email Sender names
You can set multiple email sender names as well to your sendouts, such as:
-
Data Talks -
Product @ Data Talks
If left blank, the name of your organization is used by default, which you can overwrite on the campaign sendout page.
6. Manage Multiple Domains
Using the tab structure at the top of the configuration page, you can switch between domains to manage:
-
Domain-specific senders
-
Default sender for each domain
-
Related reply-to settings
Once multiple domains are set up, users will be able to select from the full list of approved sender identities on the campaign creation page.
💡 Benefits of Configuring Domains & Senders
| Feature | Benefit |
|---|---|
| Single Domain Setup | Simple to manage, unified brand experience |
| Multiple Domains | Useful for different departments, sub-brands, or countries |
| Custom Sender Names | Tailor campaigns (e.g., ticketing@, sponsors@, merchandise@) |
| Flexible Reply Handling | Direct customer responses to the right inbox for faster support |
| No Need for Real Inboxes | Create themed or campaign-specific sender names without IT involvement |
| Improved Deliverability | SPF/DKIM/DMARC improve inbox placement and trust with ISPs |
🔍 Best Practices
-
Use clear sender names your fans recognize to avoid spam filters. You can use the name of a popular player as well to feel even more personalized and boost open rates
-
Match sender and reply-to when possible to build trust
-
Test domain configuration early to avoid last-minute delays in campaign delivery
By leveraging the domain and sender configuration settings in the CDP, your organization can create a more robust, trustworthy, and professional communication setup tailored to your audience and internal workflows.