
Overview
The Content Library is your central hub for managing media and documents within the CDP. Designed to simplify content handling for your email campaigns, it allows you to upload, organize, and insert images (like logos, banners, or footers) as well as attach other file types (e.g., PDFs, spreadsheets, presentations) via public links. With intuitive file management tools, tagging, and folder structure, it helps streamline email creation and ensures consistent branding and smooth communication with supporters.
Main Goals of the Content Library
-
Store and manage assets for use in email campaigns
-
Centralize file access across your organization
-
Link non-image files (e.g. PDF brochures) via email
-
Organize and retrieve files efficiently with filters, tags, and folders
-
Share files securely via public URLs
How It Works
You can access the Content Library from the sidebar in your CDP. Each organization has 3GB of total storage, with an individual file size limit of 5MB. If you need more space, please contact your Customer Success Manager.
Deleted files are sent to the Recycle Bin, where they remain recoverable for 30 days.
Supported File Types
-
Images: JPG, JPEG, PNG, GIF
-
Documents: DOC, DOCX, PDF
-
Spreadsheets: CSV, XLS, XLSX
-
Presentations: PPT, PPTX
Uploading New Files
You can upload files to the Content Library in two ways:
1. Upload Directly via Content Library
-
Click “Import Images” in the top-right corner.
-
In the popup, click “Choose files to upload”, and select your files.
-
Make sure the files meet the type and size requirements.
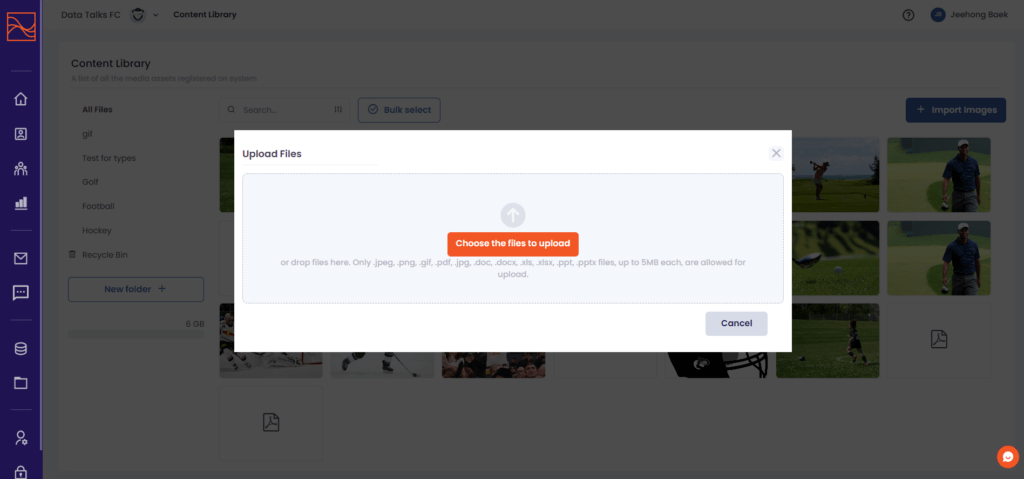 Upload files through the content library directly
2. Upload via Email Builder
-
In the Email Builder, drag and drop an Image Block into your template.
-
The Content Library popup will appear — click “Import Images” to upload.
-
Files uploaded this way are also saved in the main Content Library.
Upload files through the email builder
Managing Uploaded Files
Viewing File Details
Click on a file thumbnail to open its detail view. Here, you’ll find:
-
File name, size, dimensions, and upload date
-
Uploader info
-
Public URL
-
Email campaigns the file is used in
-
Editable fields: title, alt text, description, tags
-
Options to delete or move the file to a folder

Organizing Files
Folders & Subfolders
Create and manage folders for better structure:
-
Click “New Folder +” in the lower-left sidebar.
-
Use the three-dot menu beside a folder name to rename, delete, or create a subfolder.
-
Move files into folders from the file detail view or use “Bulk Select” for multiple files.
Tags
Tags allow flexible categorization beyond folders:
-
Add tags on the file detail page (e.g., “matchday,” “logo,” “soccer”).
-
Use tags later in filters to quickly find files across categories.
Searching & Filtering Files
Use filters to locate specific files in large libraries:
-
By Tag
-
By File Type
-
By File Size Range
-
By Upload Date Range
Combining filters makes it easier to find assets when working with larger content libraries.
Deleting & Restoring Files
To delete a single file, click “Delete File” from the detail view.
To delete multiple files:
-
Use “Bulk Select”
-
Click “Move to Recycle Bin”
Files remain in the Recycle Bin for 30 days. You can restore them anytime during this period. To delete permanently, visit the Recycle Bin and click “Delete Permanently.”
Using Files in the Email Builder
You can add both newly uploaded and existing files directly into your email templates:
-
In the Email Builder, drag an Image Element or any component using an Image into the canvas.
-
Choose from your stored images or upload a new one on the fly.
-
Files are embedded in your campaign, and you can preview how they will appear.
For documents like PDFs or spreadsheets, copy the Public URL from the file detail view and link it in your email content (e.g., “Download the brochure”).